
Saturday, June 11, 2011
Wednesday, April 27, 2011

Masking Basix
The Answer to All Your Problems: Masking Basix
Final Product What You'll Be Creating
Are you new to Photoshop? Have you been trying to teach yourself the
basics of Photoshop but have found the amount of educational material
available on the net a bit overwhelming? As the world’s #1 Photoshop site,
we’ve published a lot of tutorials. So many, in fact, that we understand how
overwhelming our site may be to those of you who may be brand new to
Photoshop. This tutorial is part of a 25-part video series demonstrating
everything you will need to know to start working in Photoshop.
Photoshop Basix, by Adobe Certified Expert and Instructor, Martin
Perhiniak includes 25 short video tutorials, around 5 – 10 minutes in length
that will teach you all the fundamentals of working with Photoshop. Today’s
tutorial, Part 12: The Answer to All Your Problems: Masking
will explain how to save selections as layer masks and refine them using the
brush tool. Let’s get started!
Quick Tip: How to Smooth Skin Without Losing Texture in Photoshop
Quick Tip: How to Smooth Skin Without Losing
Texture in Photoshop
Final Product What You'll Be Creating

There are several ways to smooth skin in Photoshop. All to often, however,
skin can appear too smooth, fake, and synthetic. Today I will demonstrate a
straightforward technique to help you smooth skin fairly quickly while
preserving the texture of the pores. Let’s get started!
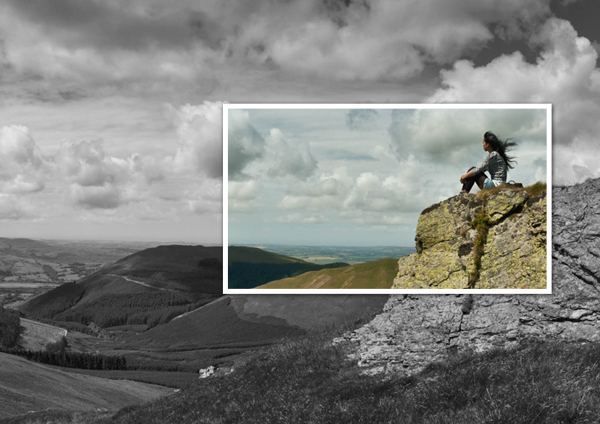
Final Image Preview
Take a look at the final image that we will be creating.
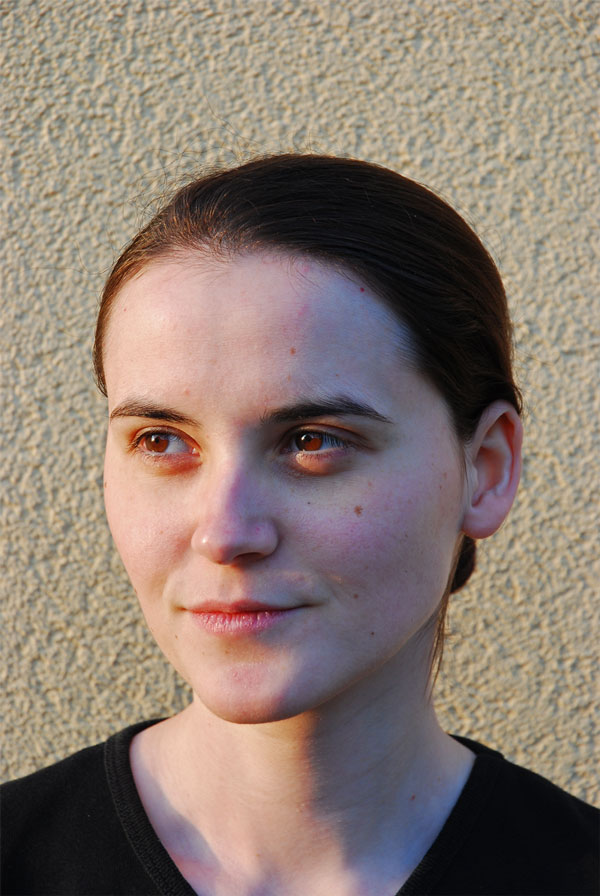
Original Image
Before we begin, let’s take a look at the original image.
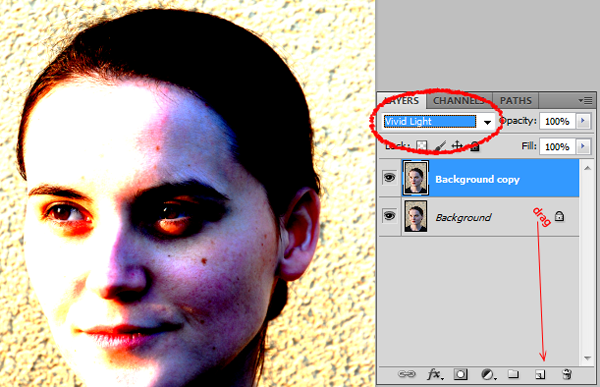
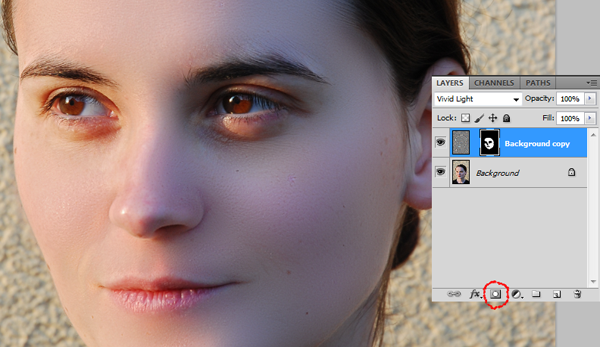
Step 1
First, open your image and duplicate your background layer. Simply drag
the layer onto the new layer icon in the bottom right of the layer palette.
Now set the blending mode of this newly created layer to "Vivid Light."
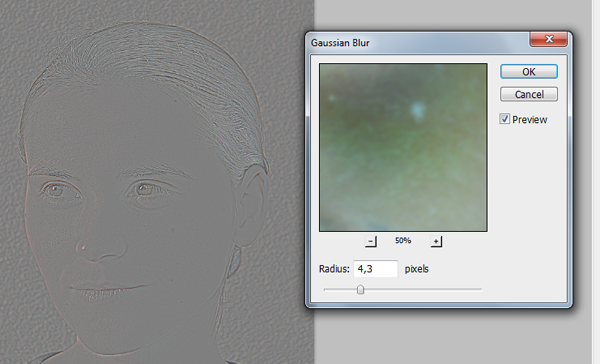
Step 2
Now, let’s invert this layer. Do this by pressing Cmd + I or Image >
Adjustments > Invert. Then, apply a Gaussian Blur by selecting Filter > Blur
> Gaussian Blur. Applying a blur filter to an inverted picture will make it
look shaper. Use the slider until you can see the pores on her face.
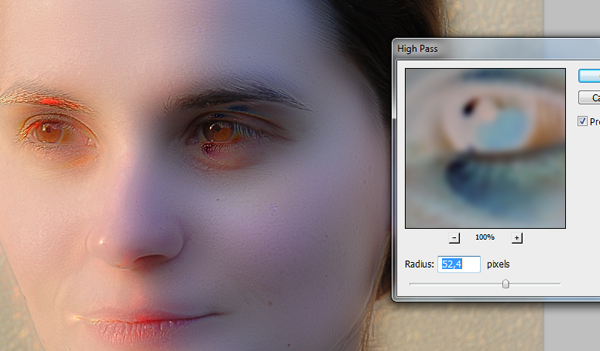
Step 3
Now let smooth the skin! Go to Filter > Other >High Pass. Move the slider
until you are happy with the smoothing. You may notice some ghosting and
other weird stuff around the eyes – just ignore it for now. Concentrate on
the cheeks, forehead and nose.
Step 4
Almost done! Create a new mask for the layer and fill it with black to
hide the image. Switch your color to white, select the mask and start
drawing on the skin with a soft brush. Start at the cheeks, move over to the
forehead, the nose and stop on the chin. If the effect is too strong for
your liking, just lover the opacity of the brush and you’re good to go!
Final Image
We’re finished! I hope that you learned a few new techniques here. If you
have a different approach, let me know in the comments!
Quick Tip: Create a Set of Scattered Polaroids
Quick Tip: Create a Set of Scattered
Polaroids
Final Product What You'll Be Creating

Creating a set of scattered Polaroids in perspective might be easier than
you think. Today, we will demonstrate the process in this quick tip
tutorial. Let’s get started!
Step 1
Create a new document, 2500 x 1850 px and paste the
wood texture onto the canvas. If you decide to use another texture make
sure that your canvas is the same size as your texture. Rename the texture
layer "WoodBG."

Step 2
Create a new layer, using the rectangle marquee tool, draw a rectangle
with the dimensions 400 x 480 px and fill it with white. Rename this layer
"Polaroid.Bg."

Step 3
Double click “Polaroid.Bg” and apply the following layer styles:

Step 4
Using the Rectangle tool draw a black rectangle inside the white base as
shown, rename this layer “Polaroid.Pic.”

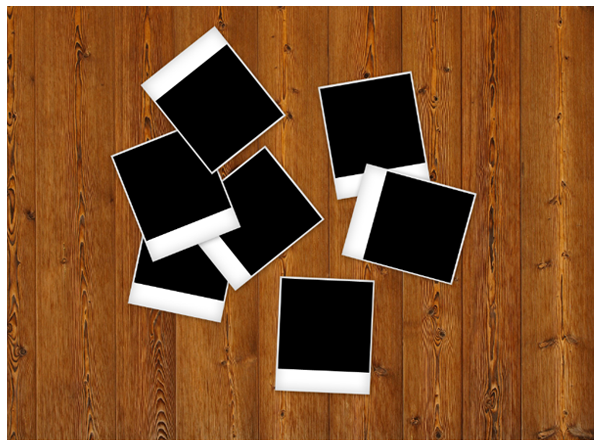
Step 5
Now comes the fun part, put these layers into a folder and name it “P1”
then duplicate the folder and move the new Polaroid around and rotate it
(Cmd/Ctrl + T and hover over the corner and rotate). Try not to rescale the
Polaroid as they are all the same size. Repeat this until you are happy and
have a nice spread of Polaroid’s (I generally use about 6-7).
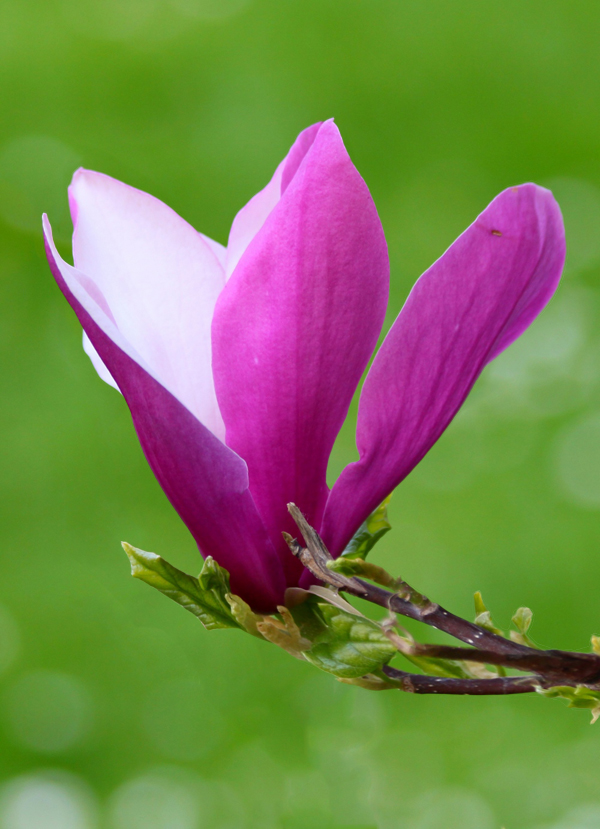
Step 6
Now that we have our Polaroid’s laid out, we need to import our image.
This can be anything you want. For this example, I will be using a
flower. Import the image into Photoshop and hide the layer. Here comes
the tricky bit, we need to select all the black on the canvas (apart from
the black in the picture which is why you hid it). Go to Select > Colour
Range and click on the black part of one of your Polaroids. This will create
a matte and select all the black on the canvas as seen below. Then press ok.

Step 7
Next, click on the Photo layer and press Cmd/Ctrl + Shift + I to invert
your current selection and press delete followed by Cmd/Ctrl + D to
deselect. Unhide the layer and now you should have something which looks
like the following:

Step 8 (Optional)
To make the 3D effect select all your layers (Click on the top layer hold
down shift and click on the bottom layer) then press Cmd/Ctrl + T and right
click inside the canvas and press perspective, drag out the handles at the
bottom like the following:

Step 9
To remove the band at the bottom simply scale up the image (Cmd/Ctrl +
T), the final step is to hide all of your black box layers in the folders,
simply go through each one and hide them.
Final Image
Quick Tip: Apply a Vintage Effect to Several
Quick Tip: Apply a Vintage Effect to Several
Images Using Actions
Final Product What You'll Be Creating

Have you ever wanted to apply the same effect to several images at once?
This is an issue that most designers face at some point in their career. In
some situations, you might be able to apply an effect individually one photo
at a time. That takes time however, and if you have dozens or even hundreds
of images to process, that is simply not possible. The solution is to create
an action and apply it using a batch process. In today’s quick tip tutorial
we will demonstrate how to create an action and apply it to several images
using Photoshop’s batch process function.
Step 1
In my particular case , I decided to apply a vintage effect to all the
photos in a folder on my machine. So the first step is to open a folder with
all the photos you want to apply an effect to.

Step 2
Next, choose a random photograph and open it in Photoshop.

To apply the same effect to all the photos you will need to create an
action. Go to the actions panel and press the New Action button. Name it
Action 1.

Press record.

Step 3
In this step I will detail all the steps I took to apply a vintage effect
to my images but you should feel free to apply any effects that you see fit,
depending on your project. Keep in mind that you are recording so every step
you take from this moment on will be recorded until you press the Stop
button.
Apply an Adjustment Layer > Hue/Saturation.

Go to Filter > Blur > Gaussian Blur: 4 px. Layer Blending Mode: Soft
Light. Opacity: 70%.

Go to Image > Adjustments > Variations (2 clicks on more cyan ). Blending
mode: Overlay. Opacity: 80%.

Go to Filter > Other > High pass: 3 px. Layer Blending Mode: Soft Light.

Go to Adjustment Layer > Gradient Map. Opacity: 60%.

Go to Adjustment Layer > Photo Filter: 15%.

Now let’s save our work as a JPEG. This is very important because it
needs to be recorded as an action. Name it as Copy as shown below.

Next, close the document. When prompted to save the changes in a PSD,
select No. This is necessary because otherwise Photoshop will ask you the
same question for all your photos.

Step 4
Now the action is ready. Press the Stop button.

Step 5
Go to File > Automate > Batch. Select Action 1, go to Source and select
the folder in which your photos are located. Check Suppress File Open
Options Dialog and press Ok.

Step 6
Sit back and watch as Photoshop does all the work for.

Conclusion
That’s it! We’re finished! Hope you learned something new!
Quick Tip: Use Puppet Warp in Photoshop CS5 to Tweak Your Images
Quick Tip: Use Puppet Warp in Photoshop CS5
to Tweak Your Images
Final Product What You'll Be Creating
Photoshop CS5′s new Puppet Warp feature can be extremely useful if you need
to make minor adjustments to your photos. In today’s quick tip tutorial we
will demonstrate how to correct a Photo with this new tool in minutes. Let’s
get started!
Step 1
First, let’s load our image. I have selected this
stock image.

Step 2
Create a selection around the object. The selection needs to be fairly
accurate but we will use the refine edge tool to fix the selection just in
case, later on. So using the Pen Tool (P) trace the path around the object
as best as you can, making sure you finish where you started creating a
single loop.


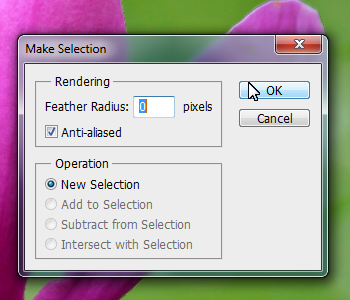
Step 3
With the pen tool still selected, right click the path and click "Make
Selection". This will now load the path as a selection. Enter the value 0
for feather radius and select ok.

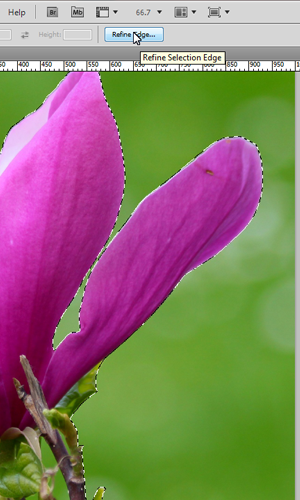
Step 4
With the selection still active, click on the Marquee Tool (M) and under
the options for the tool, click the button for "Refine Edge". This tool
allows us to refine and fix the selection as best as possible. Feel free to
experiment with the settings to find the best selection for the object if
needed. Once you have made your selection, change the output from
"Selection" to "New Layer with Mask".

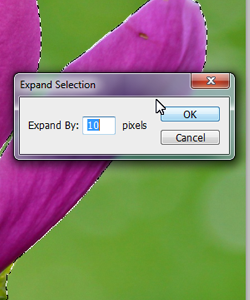
Step 5
We now have two separate layers, one with just the flower and the
original. We now need to delete the flower from the original background
image. To do this, load the original selection again (Cmd/Ctrl + Click
Masked Layer icon) and use CS5′s new content aware fill to delete the area.
For best results, expand the selection by going to Selection > Modify >
Expand, Expand by 10px and click ok. Now press Delete on the original layer
and select content Aware Fill.


Step 6
Sometimes Photoshop won’t get it right the first time and may leave some
contrasting lines. To fix this, we can use the Spot Healing Brush Tool (J)
using some content aware settings and simply paint over the lines to blend
them in.

Step 7
We can now very easily apply the puppet warp tool without destroying or
distorting the background. With our masked layer selected, go to Edit >
Puppet Warp. This will open the tool and allow us to manipulate and warp the
object. Placing points systematically around the displayed mesh will create
bending/warping points. Place them on your object in the best arrangement to
create joints to bend as shown below.

Step 8
Dragging or rotating these points (Alt + Click and move over point) will
warp the object in the desired direction. Using this we can drag the stem of
the flower to come from the side, while still allowing the flower to stay
upright.


Final Image
And that’s how you use the Puppet Warp Tool. I hope you enjoyed this
tutorial!
Subscribe to:
Posts (Atom)